Arduino
To get started with Arduino, you will need to follow a couple simple steps:
1. Install Arduino IDE
If you don't already have it, install Arduino IDE from here and launch it:
2. Install Inkplate board definitions
Copy the following URL:
https://github.com/SolderedElectronics/Dasduino-Board-Definitions-for-Arduino-IDE/raw/master/package_Dasduino_Boards_index.json
And add it to the Additional boards manager URLs in Arduino settings:

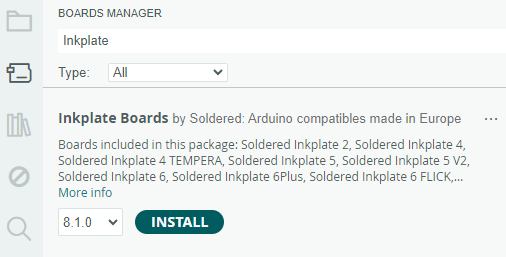
Now, it will be possible to open the boards manager, search for Inkplate and install Inkplate boards:
3. Install Inkplate library
In the library manager, search for Inkplate and install the Inkplate Arduino library:

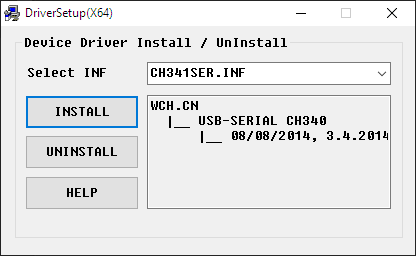
4. Install CH340 driver
CH340 is the on-board chip which enables Serial communication via USB. It's required to be able to communicate via the CH340 to upload code to Inkplate.
Download the driver via this link. Start the installation and follow the instructions:
5. Done!
You can now connect Inkplate via USB and then select your Inkplate board in Tools -> Boards -> Inkplate Boards.
Soldered Inkplate. In case it's an older model, it's on a blue PCB and is labeled e-Radionica Inkplate. It's important to select the correct board definition or else the e-Paper display won't update!
If you need help, please see this F.A.Q. page for more info.
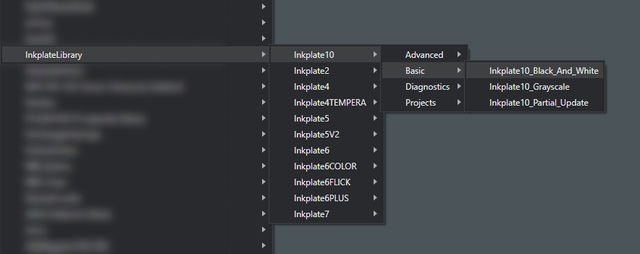
You will now be able to try out the examples found in File -> Examples -> InkplateLibrary for your board: